Didelė bendravimo su klientais istorija būna sukaupta el. laiškuose. Teamgate siūlo šią informaciją kaupti ne tik įprastinėje el. pašto dėžutėje, tačiau ir kliento kortelėse. Daugiau informacijos apie tai, kaip veikia laiškų prisegimas rasite čia.
Tam, kad siunčiant el. laiškus klientams laiškai automatiškai būtų persiunčiami ir į Teamgate- savo Outlook paskyroje turite sukurti automatinių laiškų persiuntimo taisyklę (angl."rule on messages I send";") . T.y. kad į CC eilutę kaskart siunčiant laiškus būtų prisegamas Teamgate el. laiškų persiuntimo adresas.
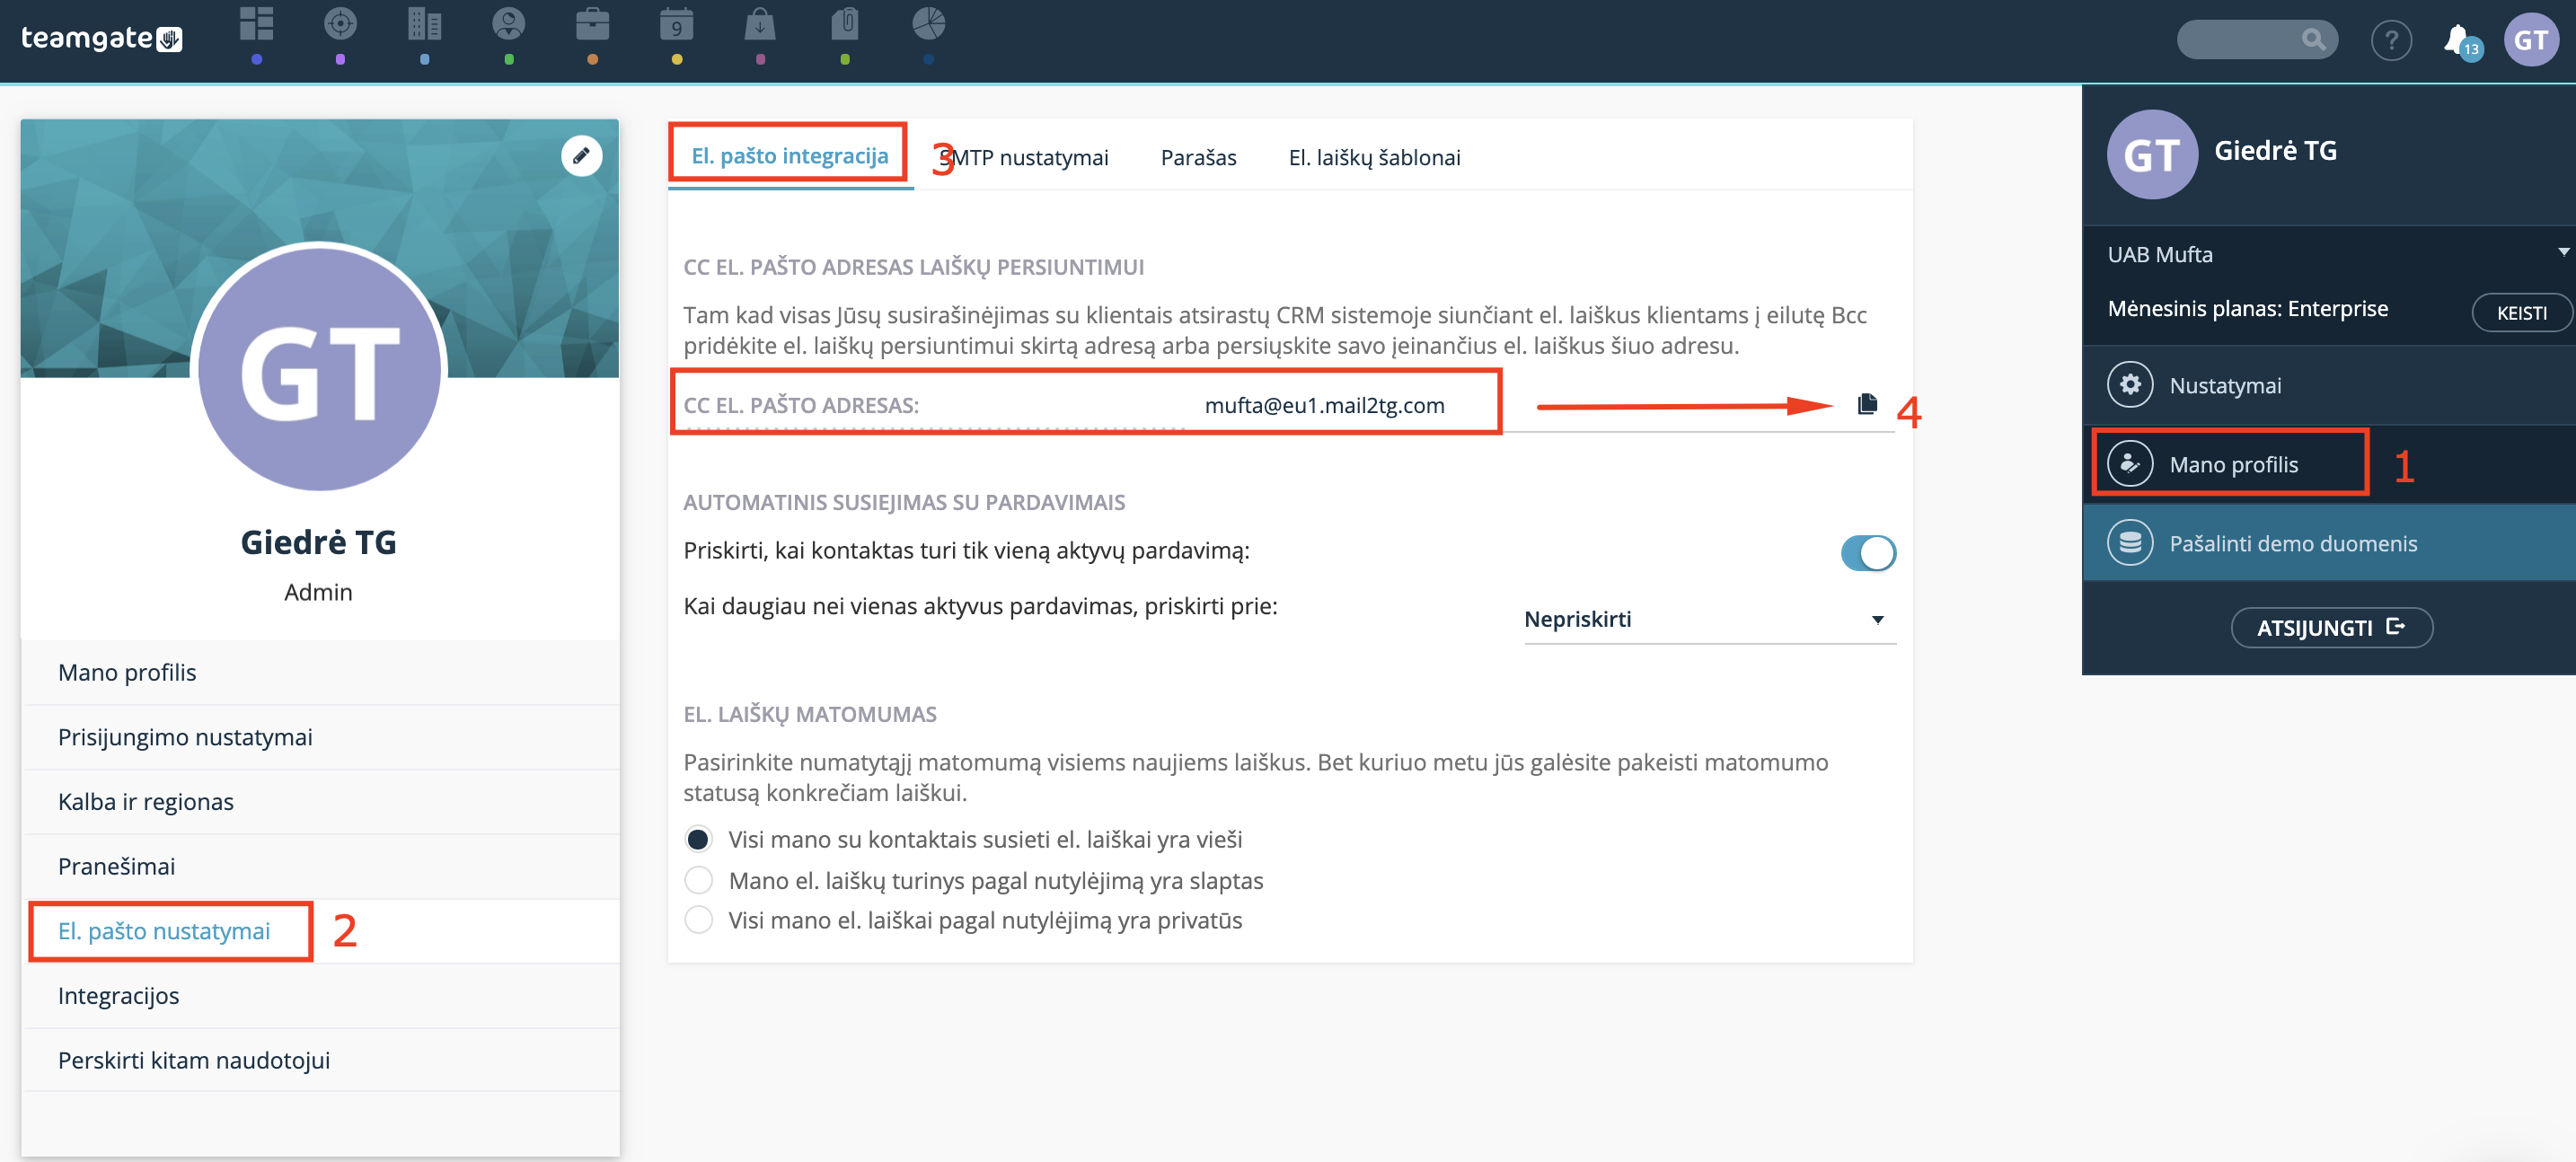
Adresą reikalingą el. laiškų prisegimui rasite taip: Mano profilis > El.pašto nustatymai > El. pašto integracija > nukopijuokite adresą paspausdami kopijavimo ikonėlę.
Outlook aplikacija turi daugybę versijų ir kiekvienoje iš jų nustatymai gali būti skirtingi. Žemiau pateiktas pavyzdys kaip sukurti automatinio laiškų persiuntimo taisyklę siunčiamiems laiškams tinkamas Outlook 2010 ir 2013 versijoms.
Jeigu Jūsų naudojamos Outlook versijos nustatymai skiriasi, rekomenduojame pagalbos kreiptis į Outlook pagalbos skyrių.
Instrukcija (Anglų k.)
1. Launch your Outlook 2013 or 2010, and make sure that you are in the mail section. Then, click Home > Rules > Manage Rules & Alerts. See screenshot:
2. After selecting the Manage Rules & Alerts option, the Rules and Alerts dialog will pop up. Under E-mail Rules click New Rule option.
3. In the Rules Wizard click Apply rule on messages I send then click Next to continue.
4. Another dialog will pop up.
-
(1.) In Step 1 check through the specified account box. In Step 2 click on the word - specified.
-
(2.) And then click the Account drop-down list to choose the account which you want to apply this rule towards. See screenshots:
5. After selecting the account, and clicking OK to return to the previous window, you will see the selected account in the Rules Wizard. Then, click on the Next button.
6. (1.) In this wizard check Cc the message to people or public group box and then click on people or public group in step 2.
(2.) In the Rule Address dialog box double-click your cc recipient to add the address to the To-> text box, (If I want to cc myself, I will select or type my own email address in the To-> column.) finally, click OK. See screenshots:
7. It then returns to the previous window and you can see the cc recipient address appearing. Then click the Finish button. See screenshot:
8. You are now returned to the beginning dialog box. Click the OK button, then the cc rule will be created. If you don’t want to enable the rule, uncheck it.
After sending, or forwarding, an email message to others with your specified account your account or your specific cc recipient will always receive the same message.